ARTICLE
Our guide: how to clean your Fridge
Published Mar 10, 2026 • Updated May 4, 2026 - 4 min read
A proper fridge clean keeps food safer, cuts down on smells and helps your appliance run efficiently. The key is to move perishables out first, clean with food-safe products, and reset the fridge to the right temperatures when you are done.
Key takeaways from this article
Keep perishables chilled in a cooler, and bin anything spoiled or out too long.
Use warm soapy water, baking soda or vinegar, then rinse and dry every surface.
Clean door seals gently so crumbs do not stop the fridge closing properly.
Reset the fridge to 3 to 4C and the freezer to -18C before restocking.

Smell something funky every time you open your fridge or freezer? It’s probably time to give your refrigerator a good clean-out. A clean and organised fridge not only ensures optimal food storage but also makes your kitchen a more pleasant place to spend time in, especially if you cook a lot. Here are the essential steps to maintain a spotless refrigerator, so you can ensure your food stays fresh and your kitchen odour-free.
Quick Answer: A clean fridge is easier to organise, less likely to smell, and better for food safety. Keep perishable food chilled at 5°C or colder while you clean, and when you’re done reset the fridge to 3–4°C (37–40°F) and the freezer to -18°C/0°F.
Move milk, meat, leftovers and other perishables into a cooler with ice packs and bin expired or spoiled food. Remember if food has been above 5°C for 4 hours or more, throw it out.
Turn the fridge off or unplug it for a full clean, especially if you’re removing shelves, cleaning behind the appliance or vacuuming accessible coils.
Remove shelves and drawers, let cold glass shelves come to room temperature, then soak parts in warm water and mild detergent for about 10–15 minutes before washing, rinsing and drying.
Wipe the interior with 1 tablespoon baking soda per 1 litre warm water for a food-friendly clean, or use a 1:1 vinegar-water wipe for stubborn odours and mineral spots; rinse and dry.
Clean door gaskets with mild soapy water and a soft brush, pulling back the folds gently so crumbs and residue don’t stop the seal from closing properly.
If the defrost drain is visible and user-accessible, flush it with
1 tablespoon baking soda + 2 cups hot tap water; if the drip pan is removable, wash, rinse and dry it too.
Vacuum exposed condenser coils with a soft brush attachment while the fridge is unplugged, but only if your model manual says they’re user-cleanable.
Reassemble, restock, restore power and reset the temperature to 3–4°C / 37–40°F for the fridge and
-18°C / 0°F for the freezer.
Total time: 30–45 minutes. Simple maintenance cadence: wipe spills weekly, deep-clean monthly if your fridge gets heavy daily use, clean gaskets every 3 months, and inspect coils quarterly or clean them every 6–12 months in dusty or pet-heavy homes.
What to use inside a refrigerator
Use mild, non-abrasive cleaners and enough tools to wash, rinse, dry and reach tight corners safely.
For most fridges, the safest routine cleaners are warm water with mild dish soap, a baking soda solution for odour control, and a 1:1 white-vinegar-and-water mix for deodorising and mineral spots; microfibre cloths, a soft brush, a bucket, gloves and a vacuum with a brush attachment cover almost every cleaning job.
Suggested checklist
Baking soda: ½ cup to make a deodorising paste for sticky spills; 1 tbsp per 1 L warm water for wipe-downs.
White vinegar: 1 cup, diluted 1:1 with water for mineral spots and lingering odours.
Mild liquid detergent: about 1 tsp per 1 L warm water for shelves, drawers and the exterior.
Microfibre cloths: 2–4, so you have one for washing, one for rinsing and one for drying.
Soft brush or old toothbrush: for gasket folds, seams and corners.
Bucket or washing-up bowl: 1, for soaking shelves and drawers.
Cooler + ice packs: enough to hold dairy, meat and leftovers while you clean.
Gloves: 1 pair, especially if you’re cleaning mould or using bleach.
Vacuum with brush attachment: for exposed coils, vents and the floor underneath the fridge.
Bulb baster or squeeze bottle: handy for flushing an accessible defrost drain.
Do
Use mild soap, warm water and a soft microfibre cloth.
Rinse and dry every surface before food goes back in.
Keep perishables chilled in a cooler while you work.
Check your manual before removing panels, cleaning coils or accessing a drain pan.
Don’t
Don’t use scouring pads, steel wool, harsh abrasives or chlorine bleach on stainless steel.
Don’t mix bleach with vinegar or any other cleaner.
Don’t spray cleaner directly into controls, vents or seams.
Don’t wash cold glass shelves with warm or hot water.

How to clean a fridge (step-by-step)
This is the complete deep-clean method, from sorting food to resetting safe temperatures.
1. Empty the fridge and sort the food
Start with the most temperature-sensitive items first: milk, meat, seafood, cooked leftovers and anything else perishable. Move them straight into a cooler with ice packs, then sort the rest into three groups: keep, use-soon and throw away. If something is leaking, mouldy, smells off or is well past its use-by date, discard it.
2. Turn the appliance off or unplug it
For a quick spill wipe, the fridge can often stay on. For a proper clean, especially if you’re removing shelves, cleaning hidden corners, clearing an accessible drain or vacuuming coils, turn the controls off or unplug the appliance first. If unplugging is not practical, keep cloths only lightly damp around lights, switches and controls.
3. Remove shelves, drawers and bins
Take out every removable shelf, crisper drawer and door bin. Let glass shelves reach room temperature before washing, then soak the parts in warm water and mild detergent for about 10–15 minutes, rinse thoroughly and leave them to air-dry or towel-dry completely. Safety: use both hands on heavy glass, and never put cold glass straight under warm or hot water because it can crack or shatter from sudden temperature change.
4. Clean the interior walls, ceiling, floor and door bins
Wipe from top to bottom so crumbs and drips fall onto areas you haven’t cleaned yet. For routine cleaning, use warm water with mild dish soap, or mix 1 tablespoon baking soda with 1 litre of warm water to clean and neutralise odours at the same time. For stubborn marks, sticky spills or mineral spots, use a 1:1 white vinegar-water wipe, but don’t let it sit for more than a few minutes before wiping with clean water and drying. Spray the cloth, not the fridge, so you don’t drip liquid into vents, seams or controls.
5. Clean the door gaskets properly
The gasket is the soft rubber seal around the door, and it traps more crumbs and moisture than most people realise. Wipe it with mild soapy water, gently pull back the folds, and use a soft brush or toothbrush to clean into the creases; then dry it thoroughly so the door can seal tightly again. Safety: wear gloves if you’re dealing with mould. Most manufacturers recommend mild detergent only on gaskets, so treat bleach as an optional sanitiser only if your manual says the gasket material can handle it; if you do use a bleach sanitiser after cleaning, a common food-surface dilution is 1 tablespoon unscented bleach per 3.8 litres (1 gallon) water, followed by a clean-water wipe and thorough drying. Never mix bleach with vinegar or any other cleaner.
6. Check the defrost drain and drip pan
If your fridge has a visible, user-accessible drain hole, flush it with 1 tablespoon baking soda and 2 cups of hot tap water using a bulb baster or squeeze bottle until water runs freely into the pan below - always check manufacturer guidelines before this procedure. If the drip pan is removable, wash it with warm water and dish soap, rinse and dry it well before putting it back. If your model requires disassembly to reach the drain or pan, stop and follow the manual or arrange service instead; many bottom-freezer and top-freezer designs are not meant to be opened up by the owner.
7. Vacuum accessible condenser coils and clean behind the fridge
Only clean condenser coils if they are exposed and your model says they are owner-serviceable. With the fridge unplugged, remove the base grille or carefully pull the fridge forward, then vacuum the grille, the open areas behind it and the floor underneath with a soft brush attachment. This is also the right time to wipe the wall and floor behind the fridge. Not every model needs routine coil cleaning: some brands recommend every 6 months only in dusty or pet-heavy homes, some suggest once or twice a year, and some newer fridges have sealed “NeverClean” condensers that need no routine maintenance.
8. Dry everything, reassemble and restock
Make sure every shelf, drawer, gasket and wall surface is fully dry before reassembly. Put food back in organised zones so air can circulate, keep raw meat sealed and low in the fridge, and avoid overfilling shelves. Restore power, reset the temperature to 3–4°C (37–40°F) for the fridge and -18°C (0°F) for the freezer, and use an appliance thermometer if you want to verify the true temperature rather than relying on the dial alone.
How to clean stainless steel without streaks
For those with stainless-steel fridges, achieving a streak-free finish is essential. Employ a soft cloth and a solution of water and mild detergent, avoiding abrasive materials that could cause scratches. Consider specialised stainless-steel cleaners for an extra shine, removing those pesky fingerprints and enhancing both the cleanliness and aesthetics of your fridge, just check with your manufacturer’s user guide to make sure the cleaner you plan to use is appropriate.
Wipe with the grain, rinse away detergent and buff dry so fingerprints and water marks don’t come back.
“Grain” means the faint direction of the brushed lines in the steel, which may run horizontally, vertically or diagonally. Find that direction first, then wipe with a microfibre cloth dampened with mild detergent and water, following the grain rather than rubbing across it. Wipe again with a clean damp cloth to remove residue, then buff dry with a clean microfibre cloth so you don’t leave streaks or watermarks behind. Avoid chlorine bleach, scouring pads, steel wool and other abrasive cleaners because they can scratch or dull the finish.
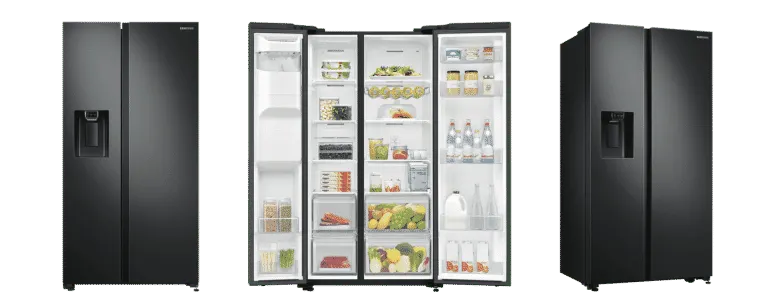
Shop Fridges
LG 635L Side By Side Refrigerator
Hisense 417L Bottom Mount Refrigerator
Samsung 635L Side By Side Refrigerator
How to get rid of fridge smells
Always remove the source first, then clean, dry and deodorise.
For a fast reset, throw out the item causing the smell, wipe the affected area with a 1:1 vinegar-water mix, rinse and dry, then place an open box of baking soda on a shelf to absorb lingering odours. If the smell is stronger, make a baking soda paste for sticky spills, wash the drip pan, and leave a bowl of activated charcoal inside overnight; while the fridge is empty and unplugged, give it at least 15–20 minutes of airing, and longer if the smell is stubborn. If odours keep returning, check the temperature, seals, drip pan and hidden spill points before assuming the problem is solved.
Fridge cleaning schedule
A simple rhythm keeps deep cleans short and stops odours and grime from building up.
Weekly:
wipe spills, handles and shelves, and check for expired food.
Monthly:
do a fuller interior clean if your fridge gets heavy daily use, or if spills, kids’ snacks and leftovers build up quickly.
Every 1–3 months:
deep-clean the interior if your household is lighter-use.
Every 3 months:
clean door gaskets thoroughly and refresh your baking soda deodoriser if you use one.
Every 6–12 months, or sooner if dusty/pet-heavy:
clean accessible coils, following your manual.
You may also be interested in ...
Customer rated: the top-selling Fridges to buy now!
How long do Fridges last? Find out when to replace yours
Energy efficient Fridges: how to buy right for your household
Fridge cleaning FAQ
These quick answers cover the most common fridge-cleaning searches in one line each.
How often should you clean a fridge?
Wipe it weekly, deep-clean it every 1–3 months, and move to a monthly deep clean if your household uses the fridge heavily or spills build up fast.
Should you unplug the fridge to clean it?
For a deep clean, yes if possible—especially before moving the appliance, cleaning behind it or vacuuming accessible coils.
What is the best cleaner for inside a refrigerator?
Mild dish soap and warm water are best for routine cleaning, with baking soda solution for odours and 1:1 vinegar-water for deodorising or mineral spots, followed by a rinse and dry.
What is the fastest way to remove fridge smells?
Remove the source, wipe the inside with 1:1 vinegar-water, dry thoroughly, then use baking soda or activated charcoal to absorb what’s left.
Is bleach safe to use in a fridge?
Only after cleaning first and only on surfaces your manual allows, with a typical sanitising mix of 1 tablespoon unscented bleach per 3.8 litres of water—and never mixed with vinegar or other cleaners.
How do you clean door gaskets?
Use mild soapy water, lift the folds, brush gently into the creases and dry the gasket thoroughly so it keeps sealing tightly.
Can glass shelves go straight under warm water?
No—let them come to room temperature first, because sudden temperature change can crack or shatter the glass.
Time for a new Fridge?
Sometimes not even a deep clean can save an old fridge. Maybe it’s not running as well as it used to, your family has out-grown your fridge’s size, or you’ve realised you’re missing out on the latest features and innovations. As you consider these things, it's also worth contemplating whether it's time to welcome a new refrigerator into your kitchen. Our Fridge Buying Guide has everything you need to know to choose the right fridge for you and your family.
Know any good tradies? We do! The Good Guys Home Services can send a licensed and insured tradie to take care of your refrigerator installation. Once they’ve taken care of the fridge installation, they can even take away your old one, and take away all the rubbish with them. Whether you need help installing the water line to your fridge, connecting up the ice maker or a simple fridge installation, The Good Guys Home Services take care of your fridge installation from start to finish, so you can kick back with a cold drink sooner.
A well-maintained fridge isn't just a kitchen necessity; it contributes to a healthy, organised, and inviting home. Discover The Good Guys range of fridges and freezers in-store and online.